How to work with multiple walls
One perk of Slice-Up is that it can generate a continuous tool-path for multiple walls.
NOTE: from now on I will refer to multiple walls object as
multiObject, while we will call each wall aloop
In this tutorial I will show a bit of the general work-flow of working with multiple walls. Specifically, I am going to detail:
- How to create
multiObjects - How to modify
multiObjects
In order to simplify visualization, in the examples I will use a layer height of 10mm.
Here are the example files we will use:
[add image of primitvie + wave + rotated]
Creating multiObjects
Multi objects are created using the Offset module.
NOTE: you can add up to three offset loops to your original wall, which means that you can create objects with up to 4 walls.
NOTE: All loops will be automatically sorted outside in, so you don’t need to worry about the order when using multiple loop.
General offset rules:
- Negative values offset to the outside
- Positive values offset to the inside
- For
loopsyou can either set an independent distance, or repeat theprevious loopoffset.
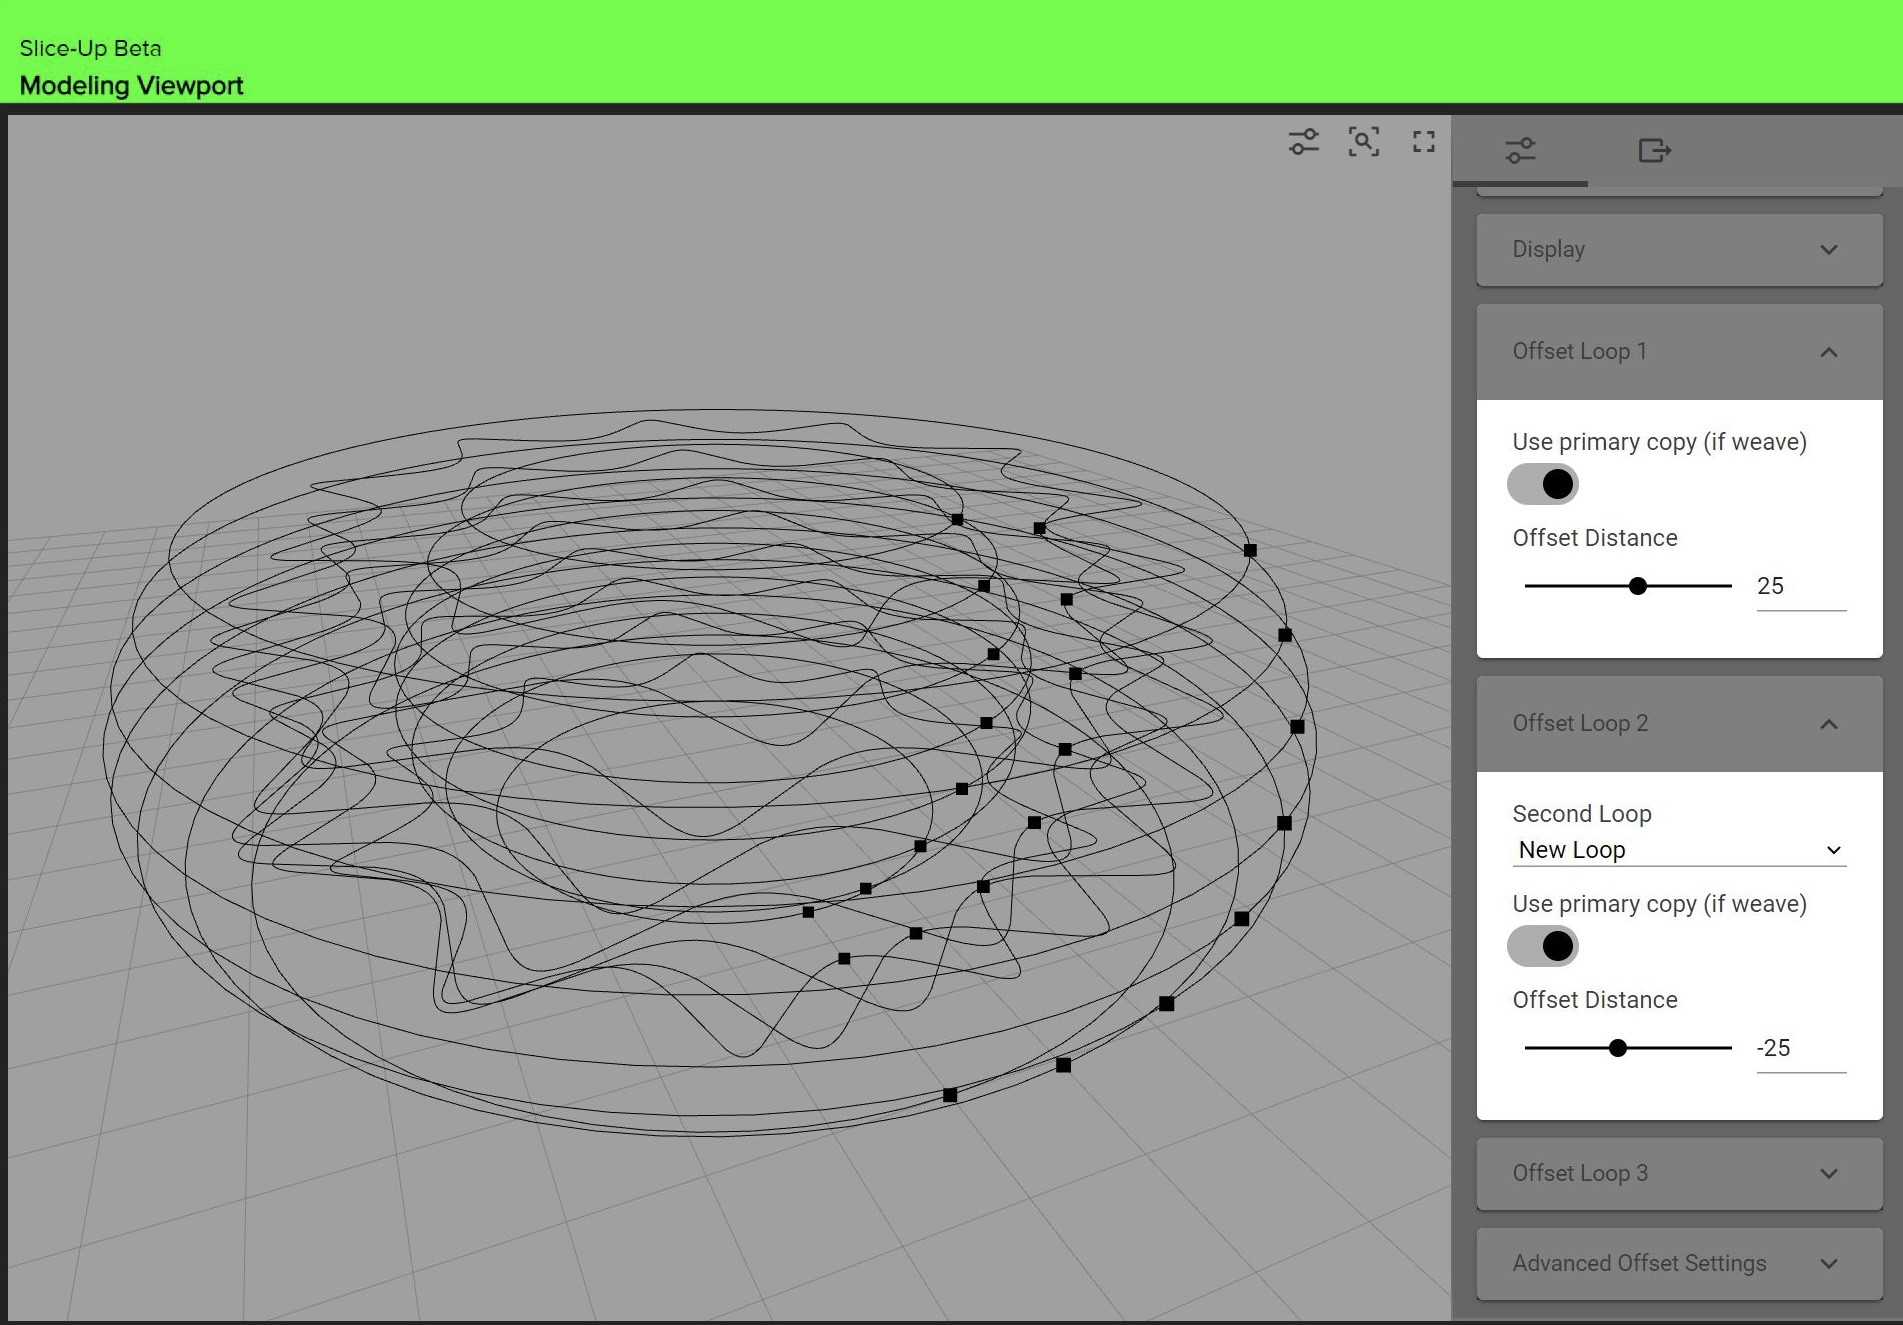
Let’s see an example:
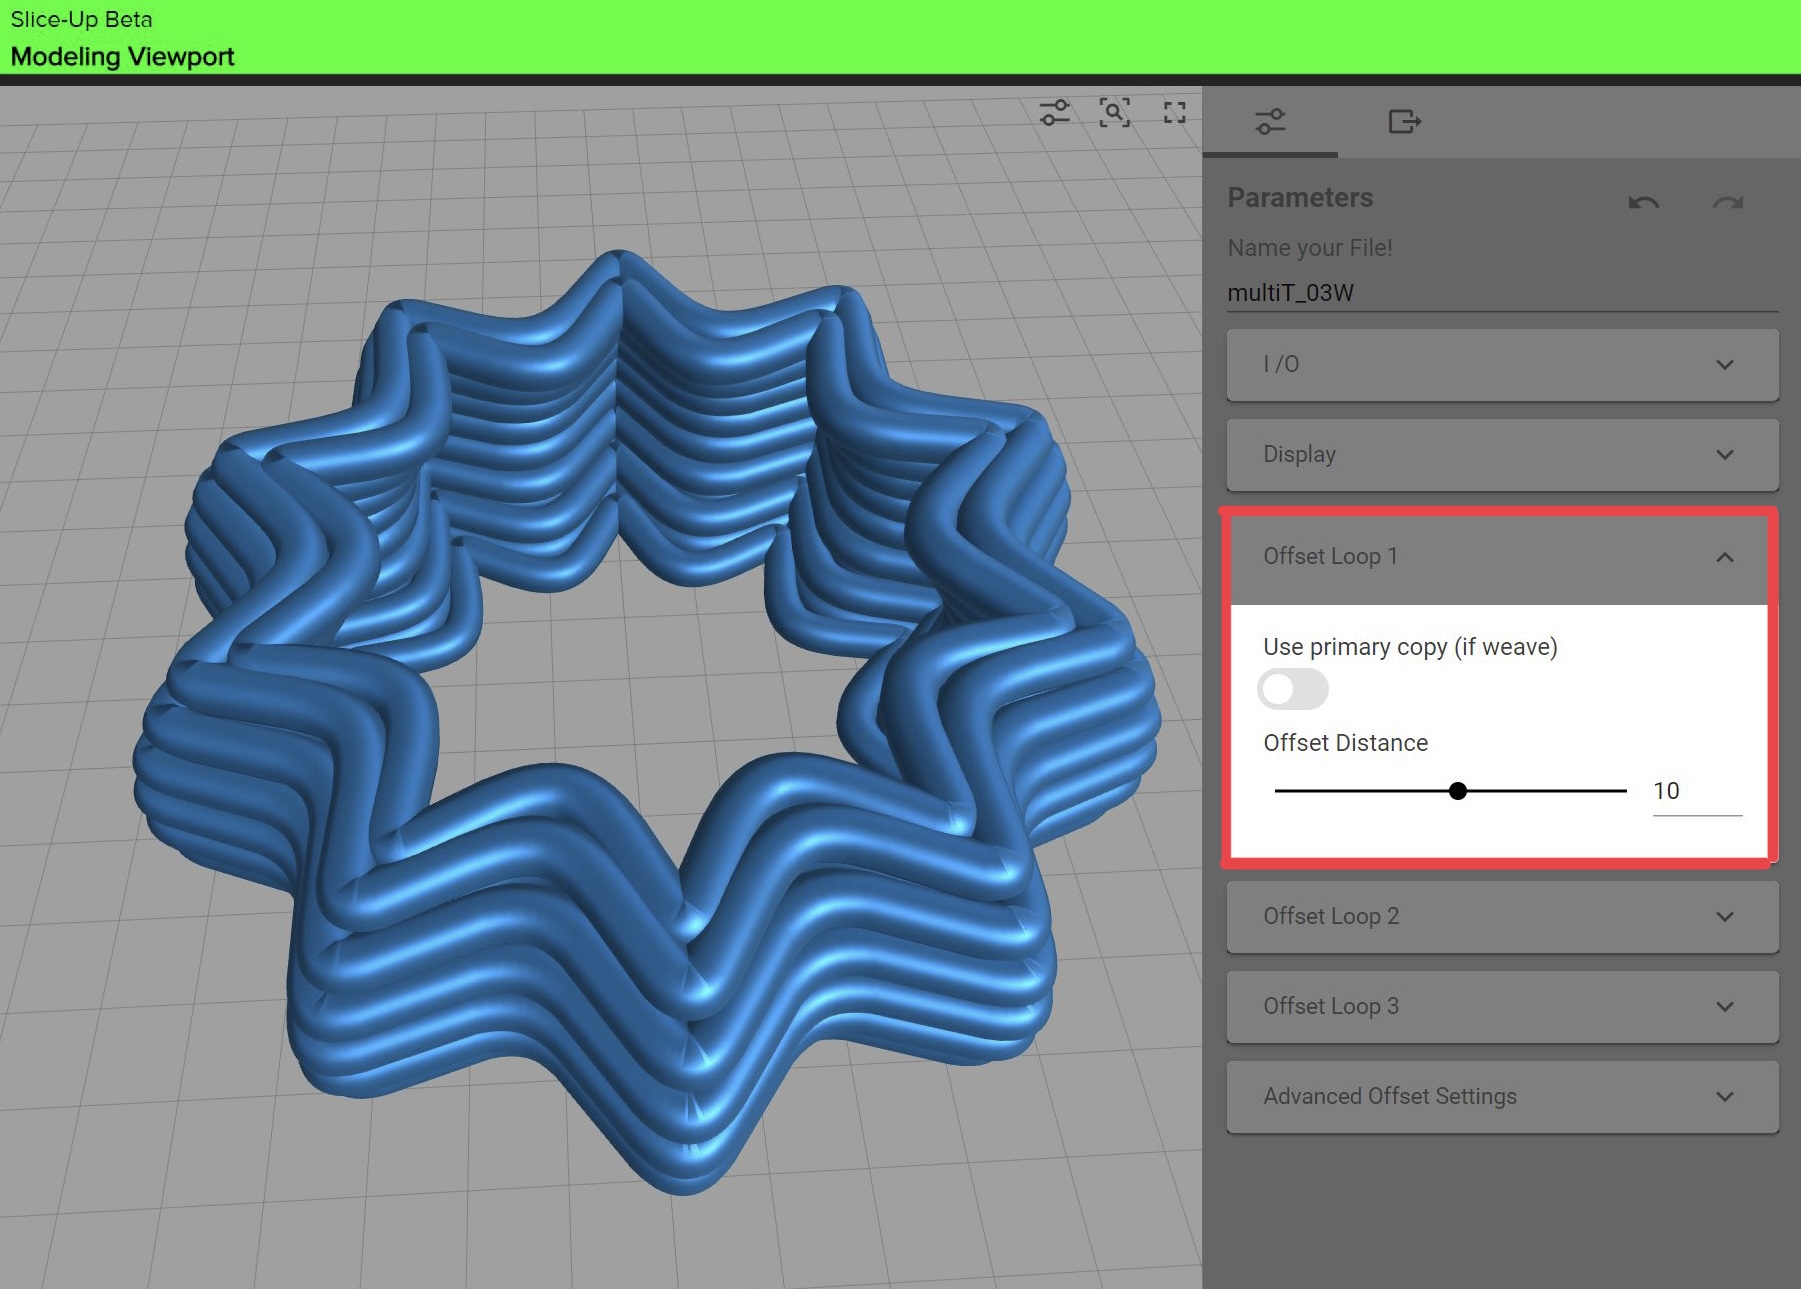
First we set a offset distance equal to the extrusion width for the first loop. This will create a thicker wall.

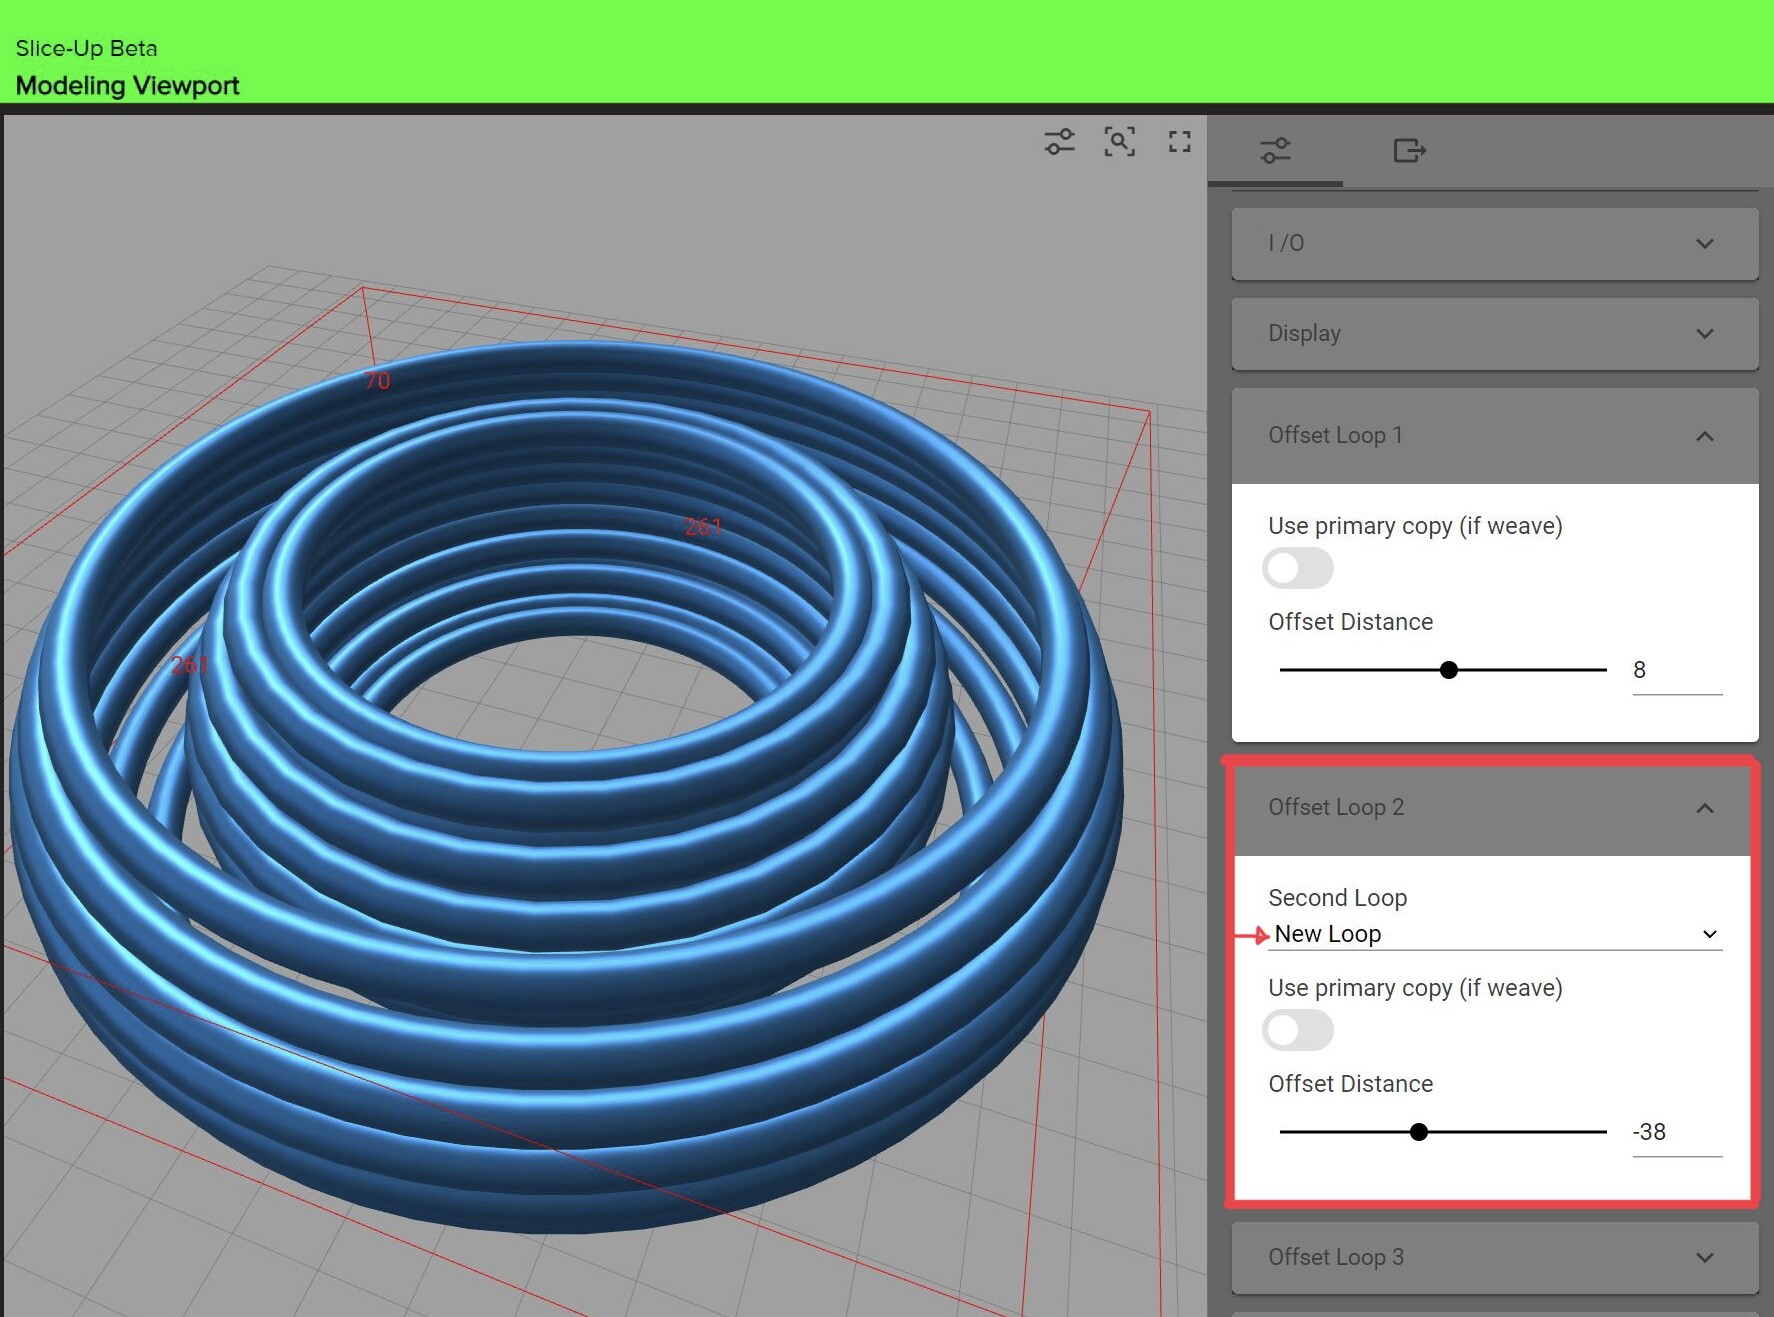
Next, we select New Loop in the Second Loop tab and set a negative value for the Offset Distance. This will make our object wider.
Finally, we select Repeat first Loopduplicate the first offset in the Third loop. This will copy the very first offset, so to also make the outer wall thicker.
UPDATE:
Repeat first Loophas been replaced byRepeat Previous Loop

Offset and Waves
WARNING: wave offset is a
loose offset. It does not strictly respect the offset distance at all points in the path. This can be more or less of a problem depending on your design and/or print technology, so plan accordingly.
When importing waves in the offset module you can choose to force it to use primary curves. If you do this, the new loop looses its wave structure.
Let’s consider the some examples:
Here is a simple offset that double the wall thickness, you can notice it is loose.
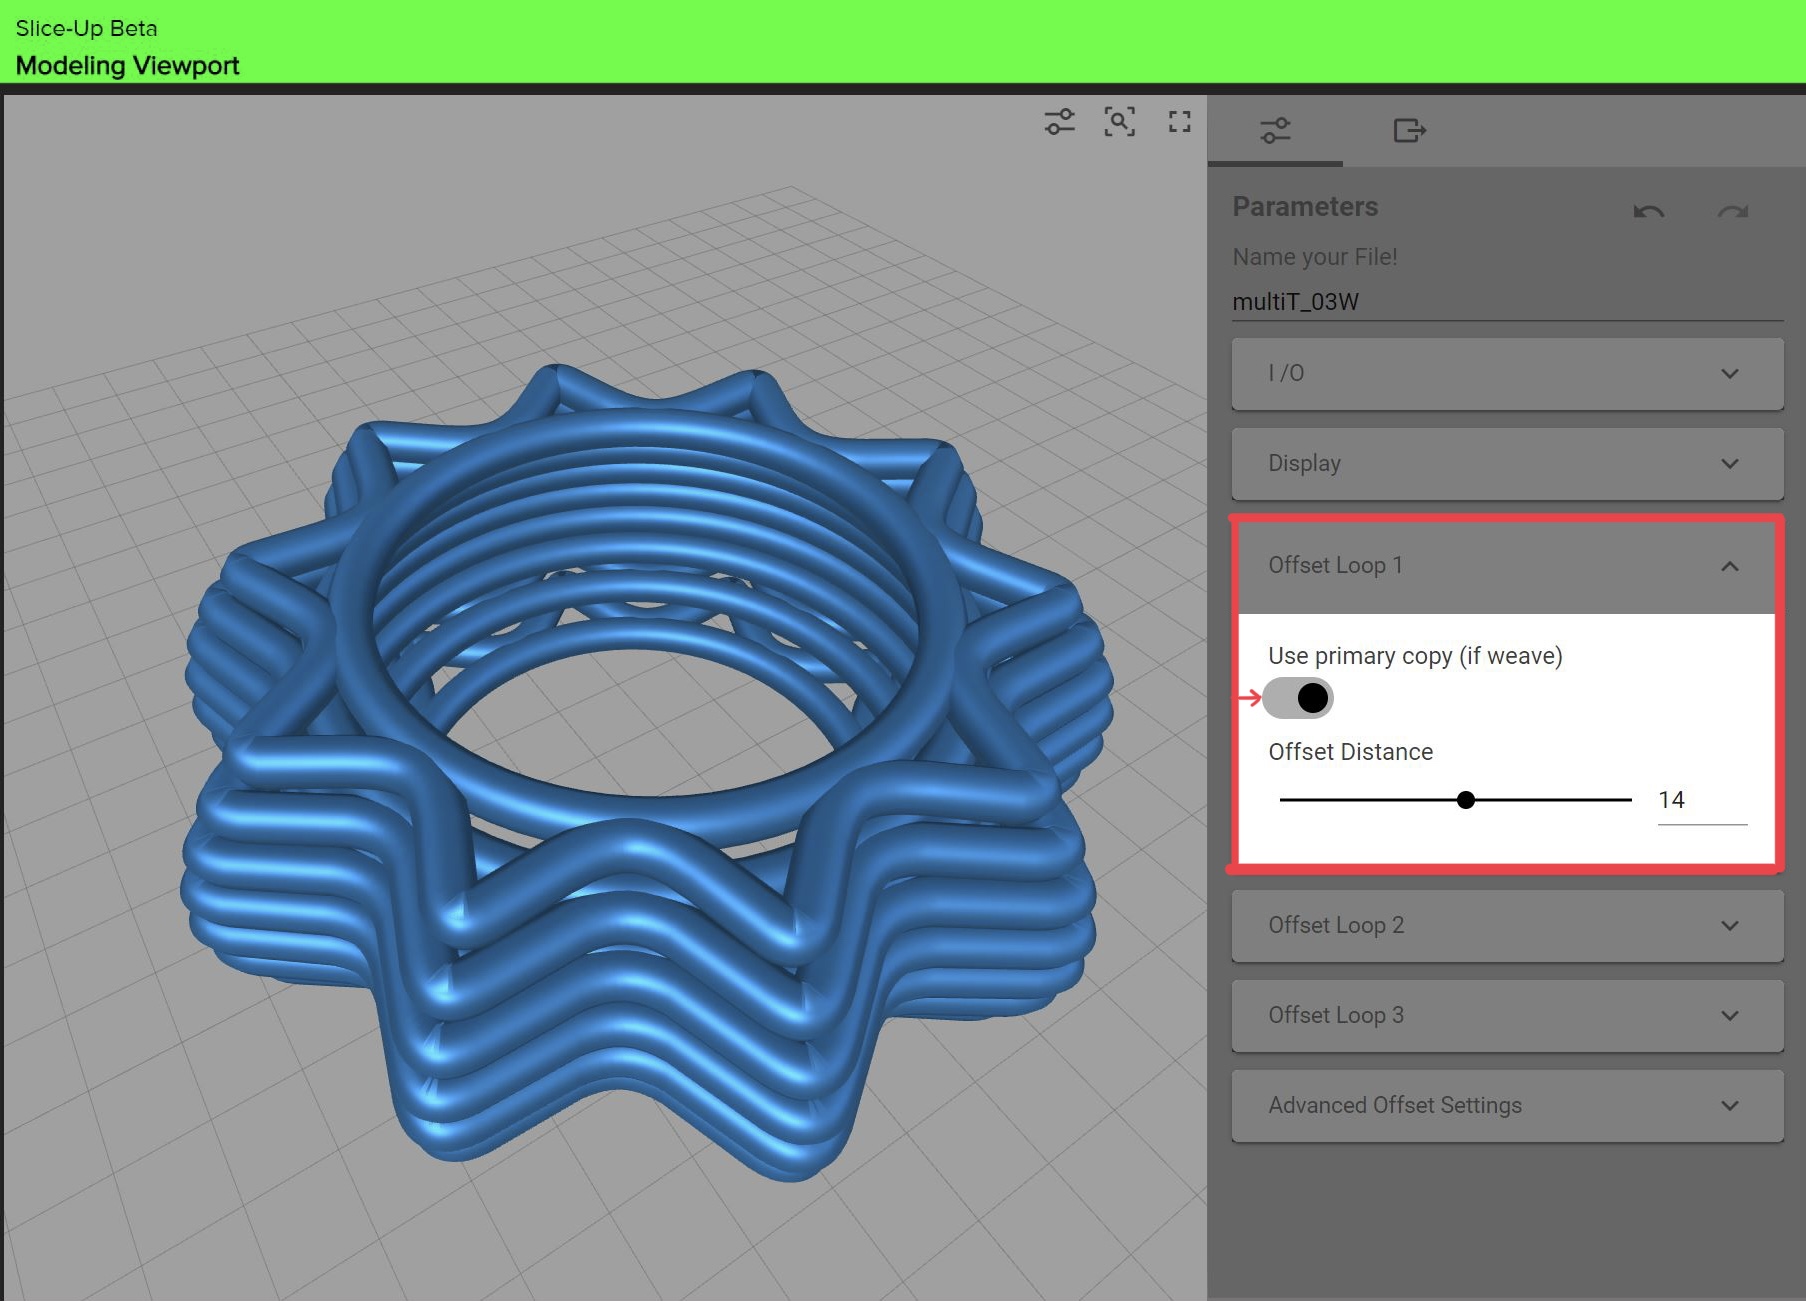
Here we force the offset to a primary copy in order to obtain a smooth finish on the inside while having a wave structure on the outside.
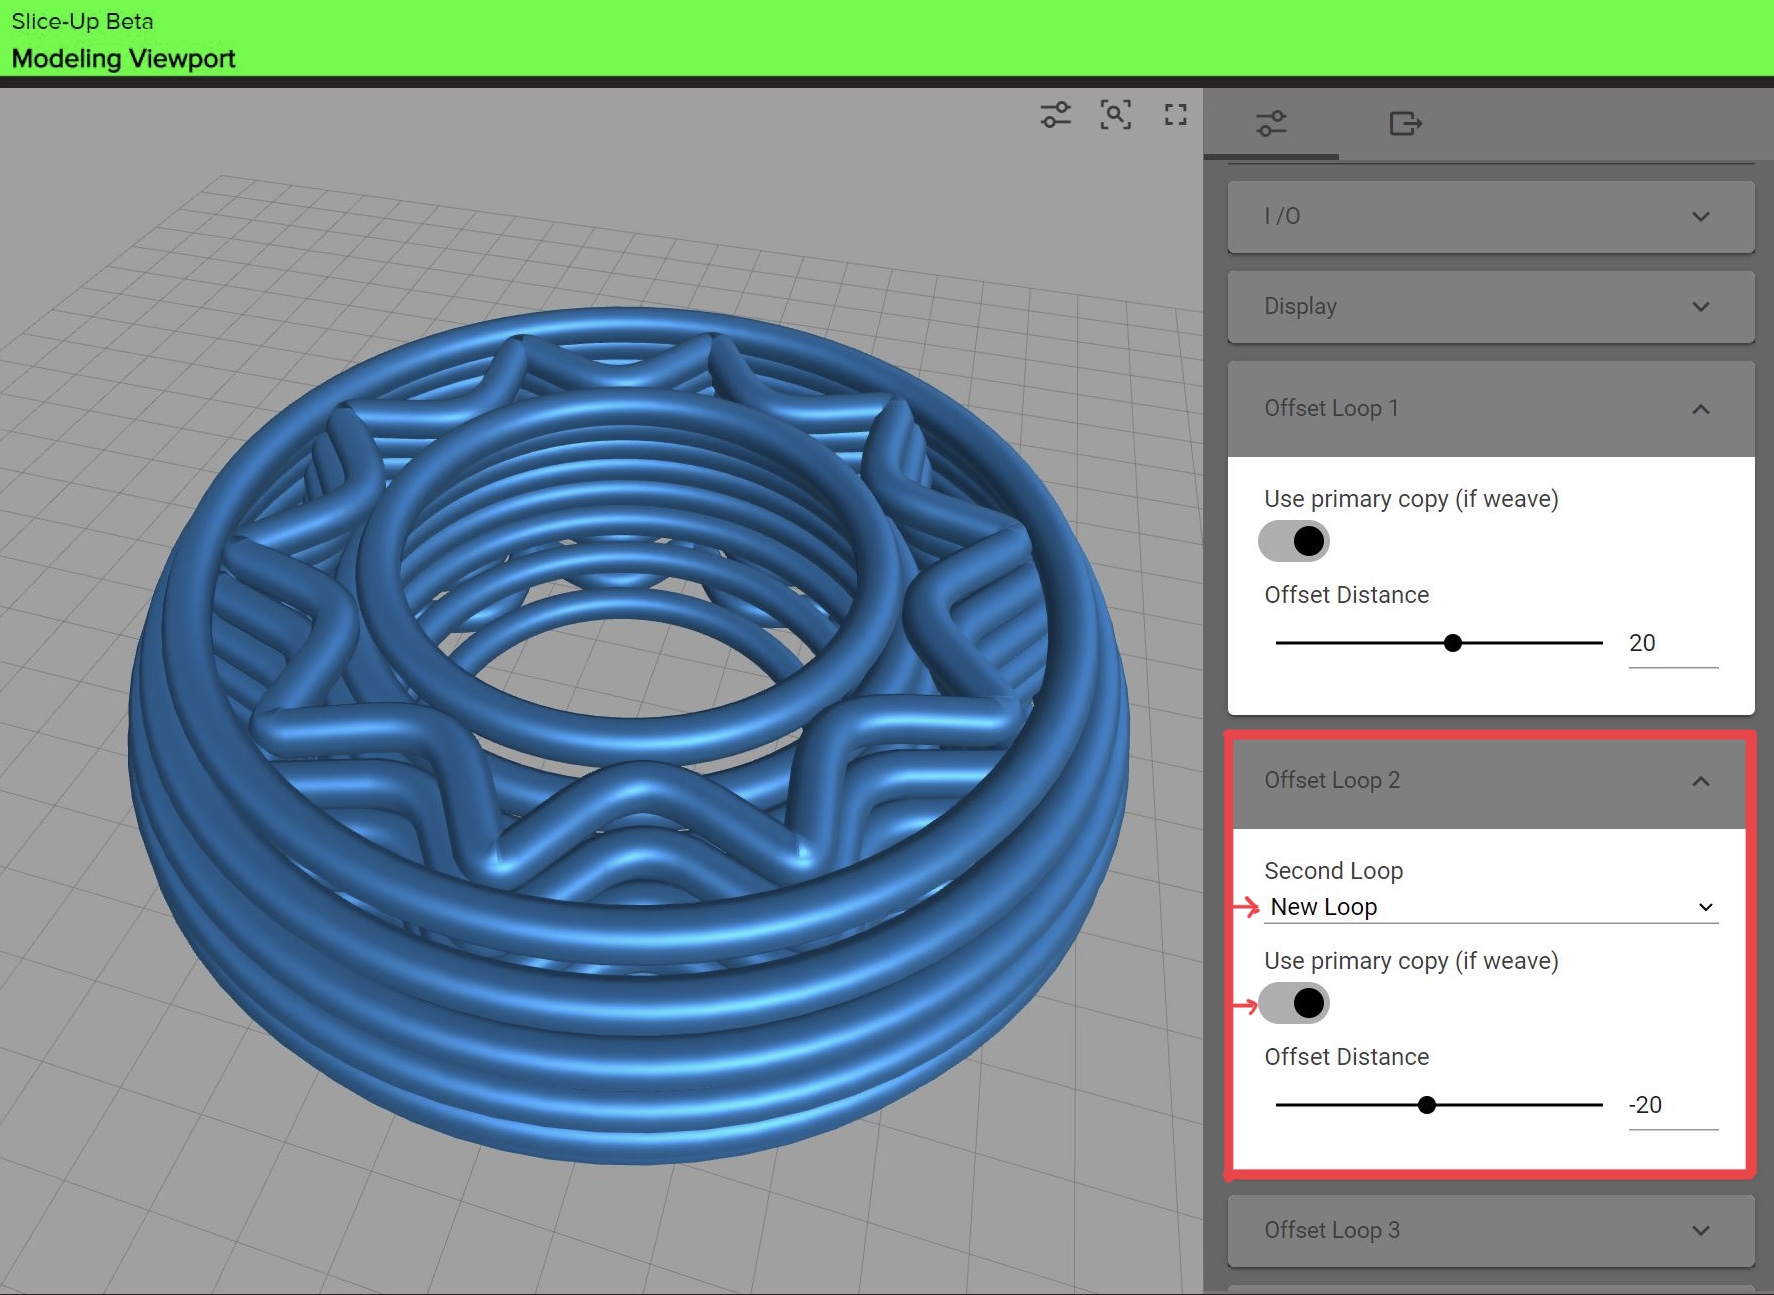
Finally, we create a new loop that is also forced to use the primary copy.
This way, we will keep the original wave structure stays in between two smooth walls.
Further modifying multi-objects
Once you created a multiObject you can export it and continue to work on it as usual.
WARNING: You can not import a
multiObjectinto theOffsetmodule, theCombinemodule or theSpiralmodule. If you do, you will get a error message.
NOTE: when modifying a
multiObjectyou can only work on oneloopat the time.
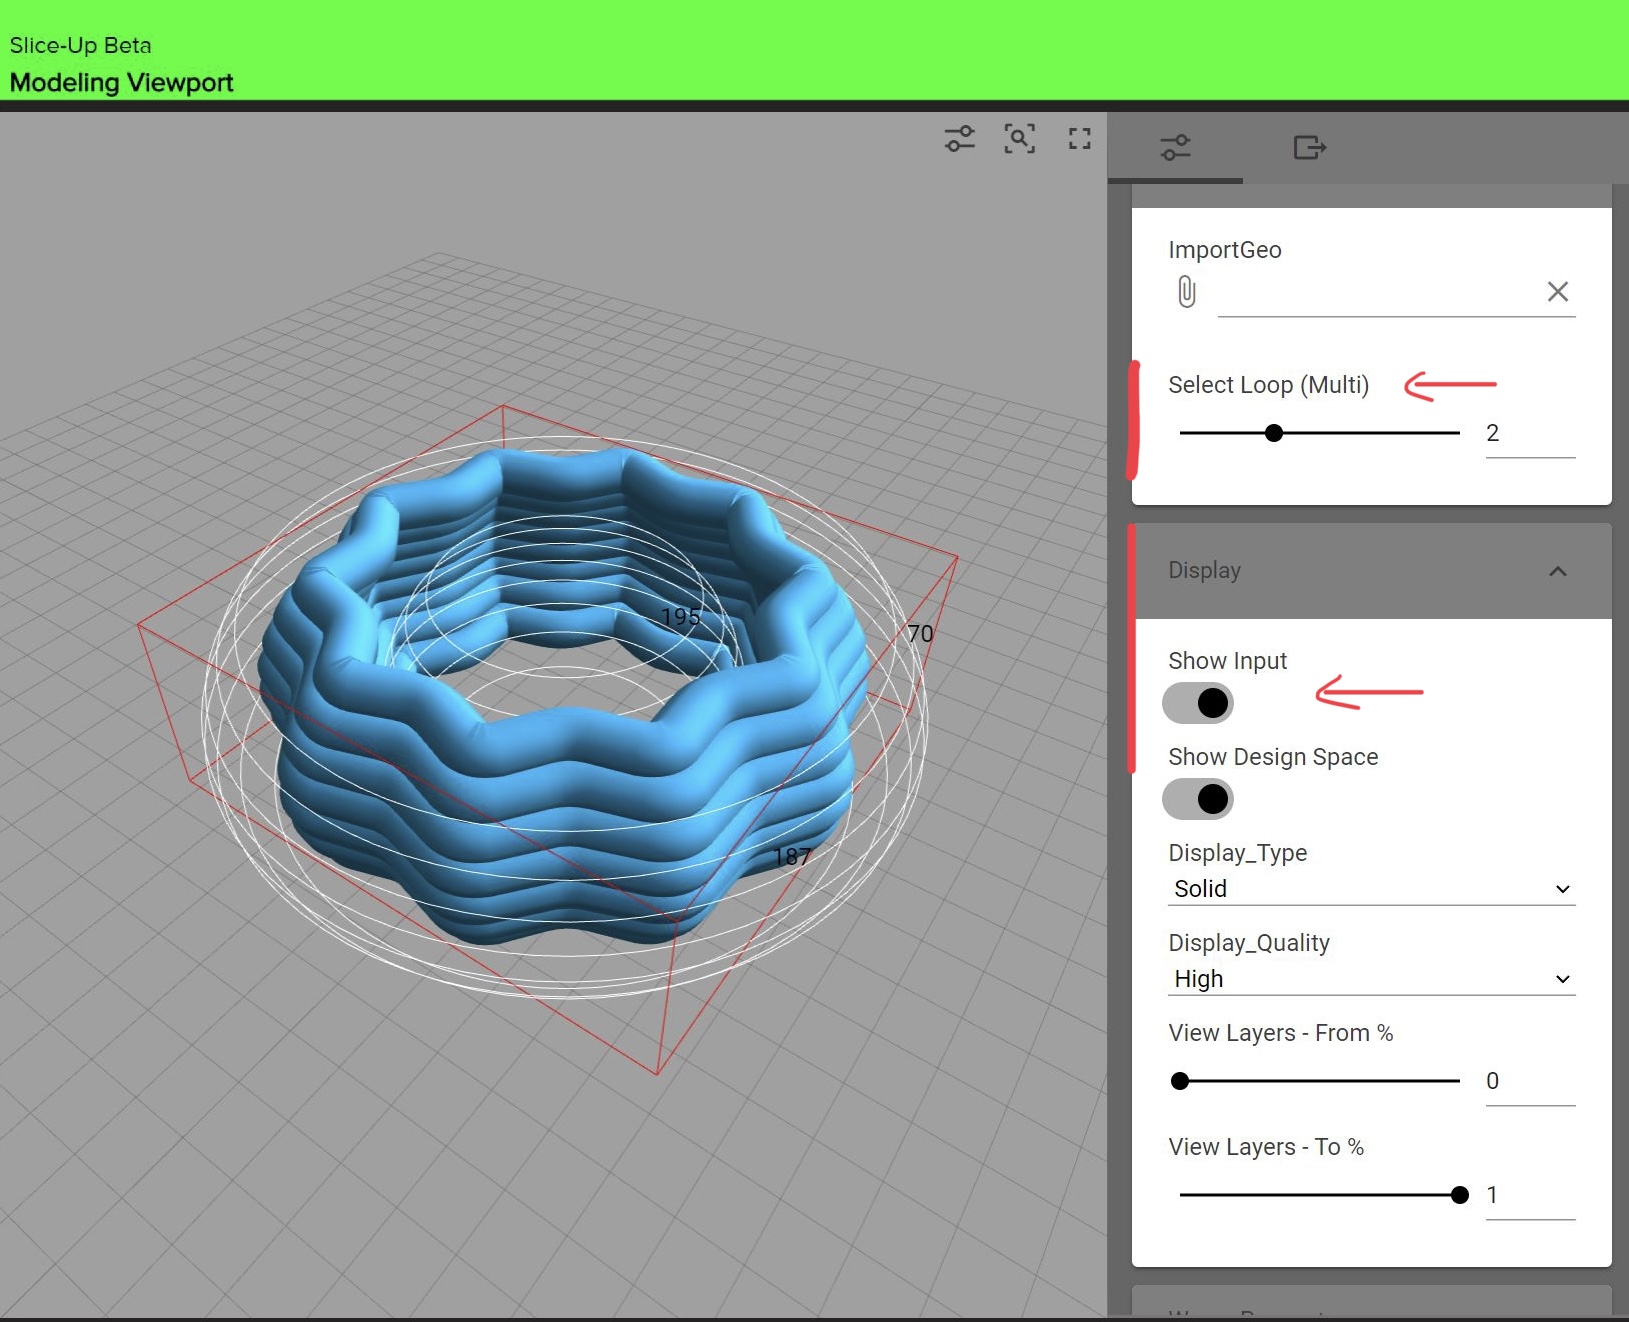
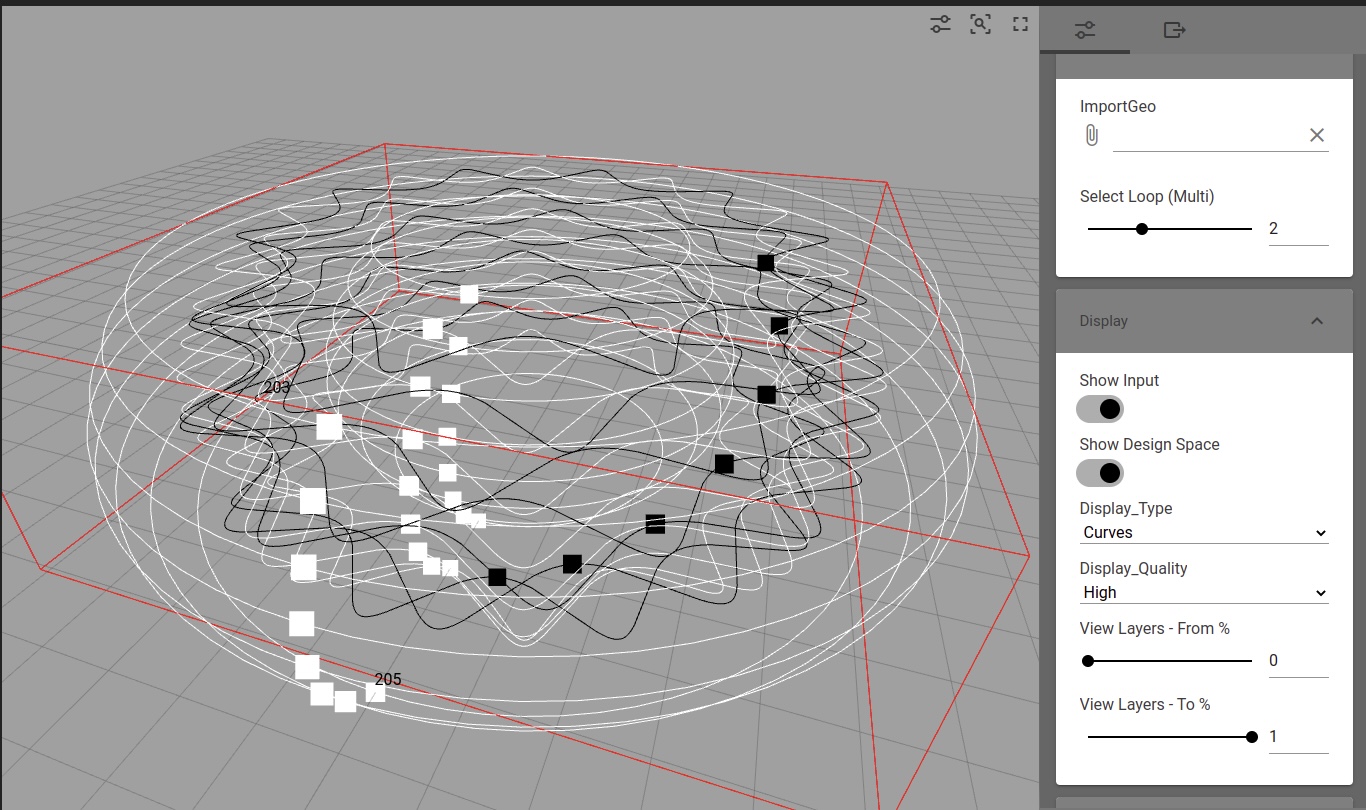
Upon import of a multiObject:
- Make sure to toggle
show inputin theDisplay tab. This will allow you to see all theloopsas a reference. - Select the desired
loopin theI/O tab - Exporting will export the entire
multiObject, but it will replace theloopyou just worked on.
TIP: you can quickly modify different
loopsby exporting and re-importing while switchingloopsin the process.
Applying transformations
The same general workflow applies when importing into Transform. In the following example the a scale function is used to modify the shape of the outer wall:

When applying rotations to a multiObject you must pay extra attention to the seam location.
WARNING: applying a rotation to a single loop will result a mismatch between the seams
In this example we apply a 90 degree rotation to the middle loop, and you can see how the seams on different loops (white) remain unchanged:
To avoid this problem, you can either apply the same rotation to all loops recursively, or you can apply the rotation before using the Offset module. The latter is showed in this example:
Multi-ojects and baseFill
In order to build a base for a multi-wall object, simply import it into the baseFill module. The outer loop will be automatically selected and you can proceed as usual.
Generating gcode
In order to generate gcode for a multiObject you must use the Multi red module, and pay particular attention to the parameters that control the seam.
Here you can find some general information about generating the gcode.
Hope this helped!