This step-by-step tutorial will help you get your first successful print using Slice-Up
For your first print is better to keep things simple: the whole procedure is divided in two macro-steps:
- Create your first object: this is done using the
vaseShapemodule - Turn the object into g-code: this is done using the
Spiralmodule
FURTHER READS: Slice-Up overview and general info on generating gcode.
Let’s get started!
Part One: create an object
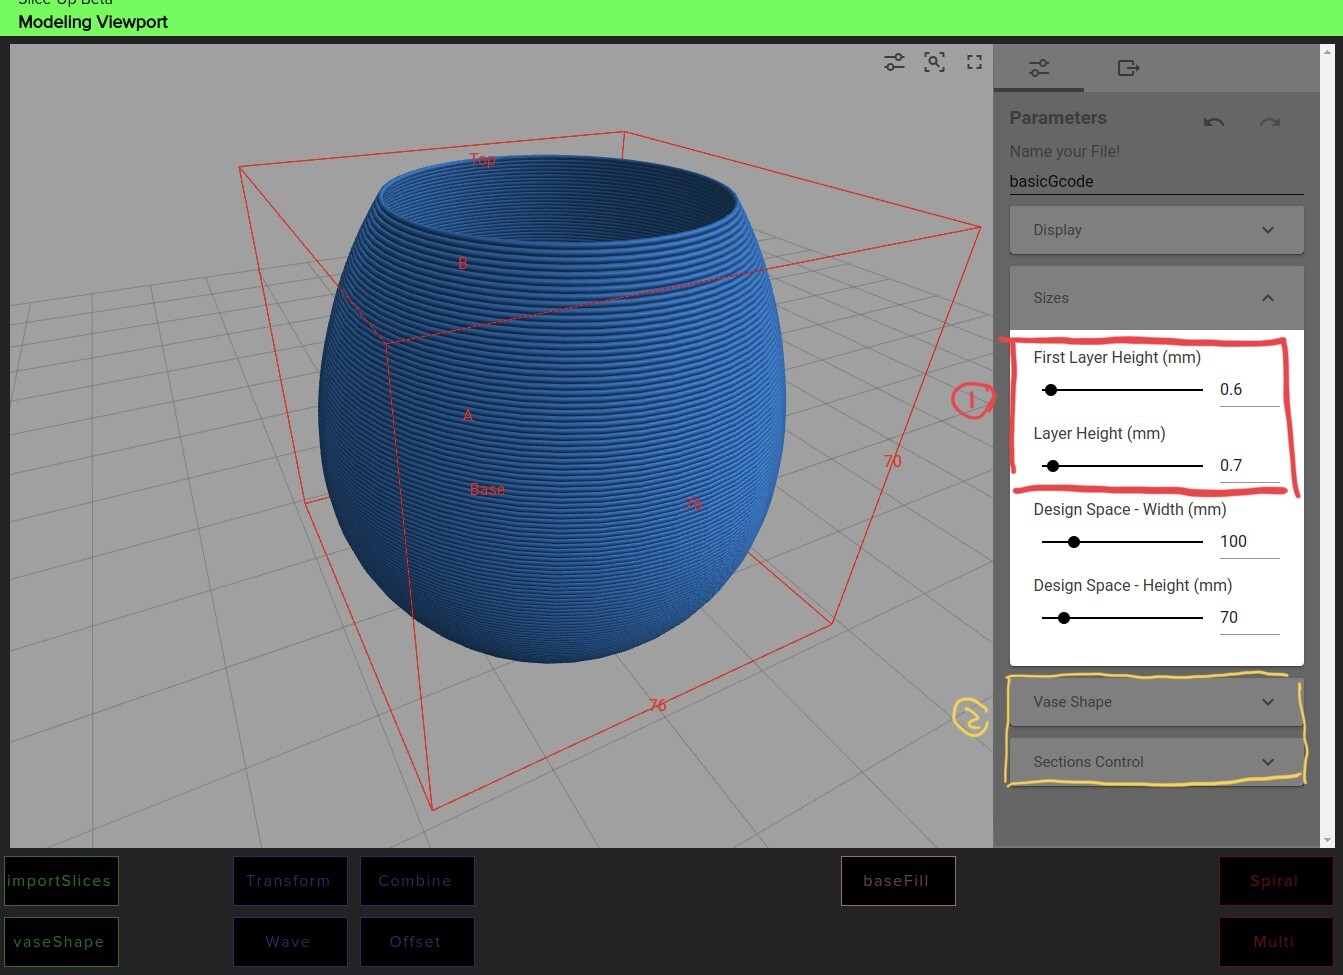
Access Slice-Up Beta modeling viewport, and select the vaseShape module.
Then, take the following steps:
-
Set the desired layer height.
-
Play around with the shape parameters until you are satisfied
- Download the file from the download tab.

Your file is downloaded as .3dm, which is Rhino native format.
Congratulations! You just completed the first step!
Part Two: prepare the gcode
In the modeling viewport, click on the Spiral button on the bottom right of the screen.
WARNING: To complete this step you must have your g-code head and tail
.txtfiles ready. If you need help doing it please read this before asking for help.
First, you must import the necessary file to work with:
-
click on
Import Print Objectand select the.3dmfile you just created -
click on
Import gcode Headand select your head.txtfile -
click on
Import gcode Tailand select your tail.txtfile -
you can skip
Import Base Brimfor now

Next, we need to set up the bed and place the object. The bed is represented by the red square (circle, for Deltas):
-
Select your
printer type -
Set the
bed sizeordiameter -
Set your
X Print PositionandY Print Position
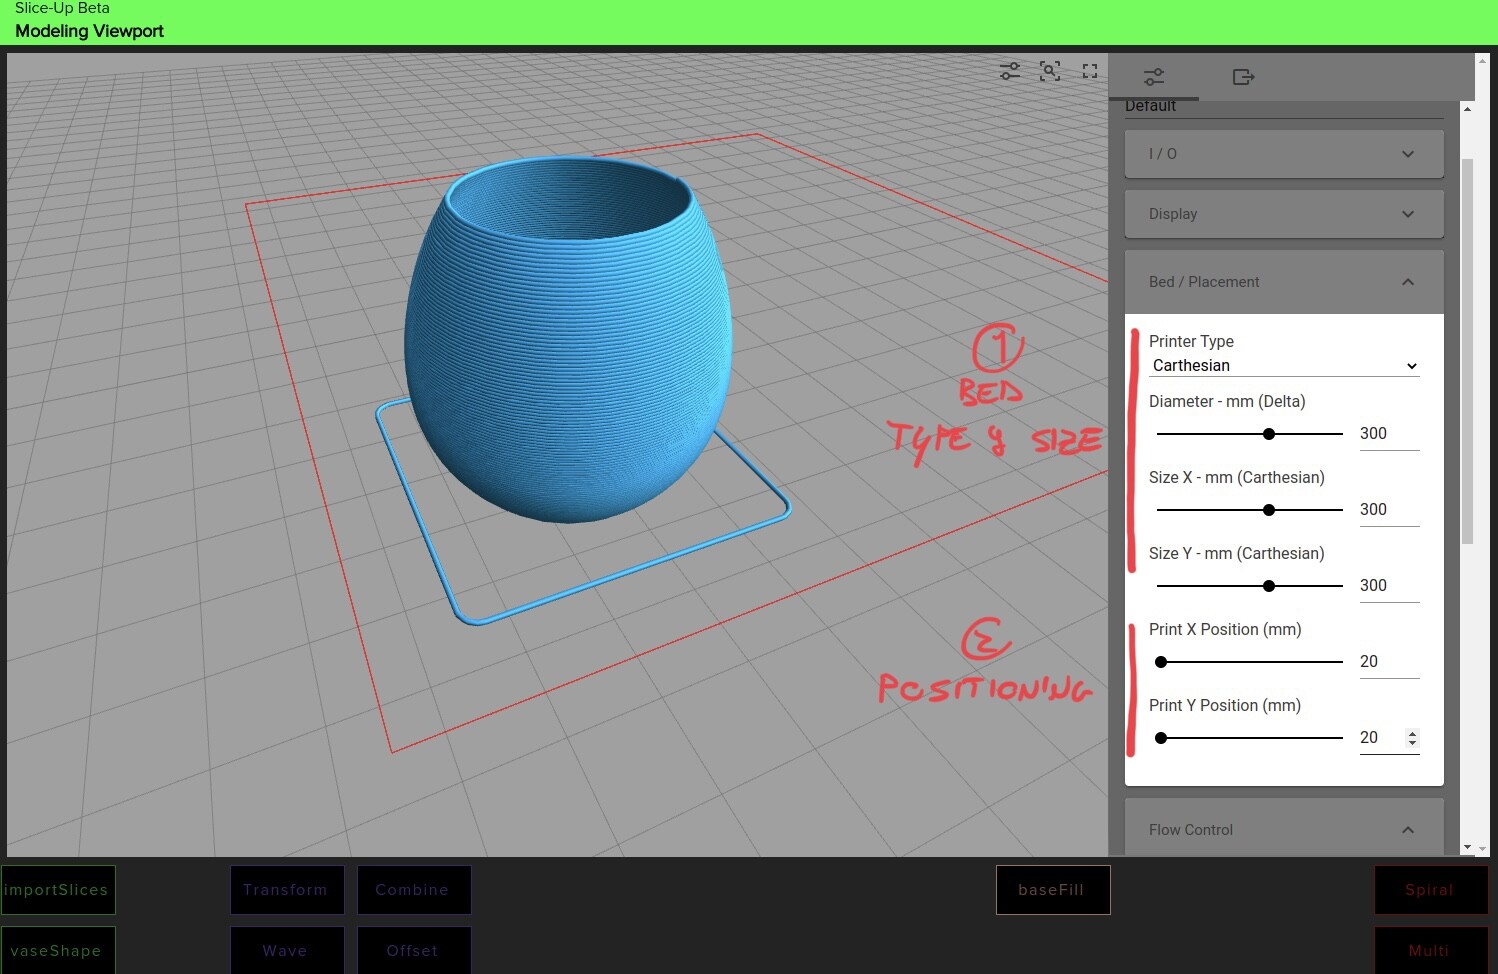
INSIGHT: cartesian printers usually have the 0,0 in the upper left corner, while delta printers have the 0,0 in the center. Print X Position and Print Y Position will move your object accordingly.
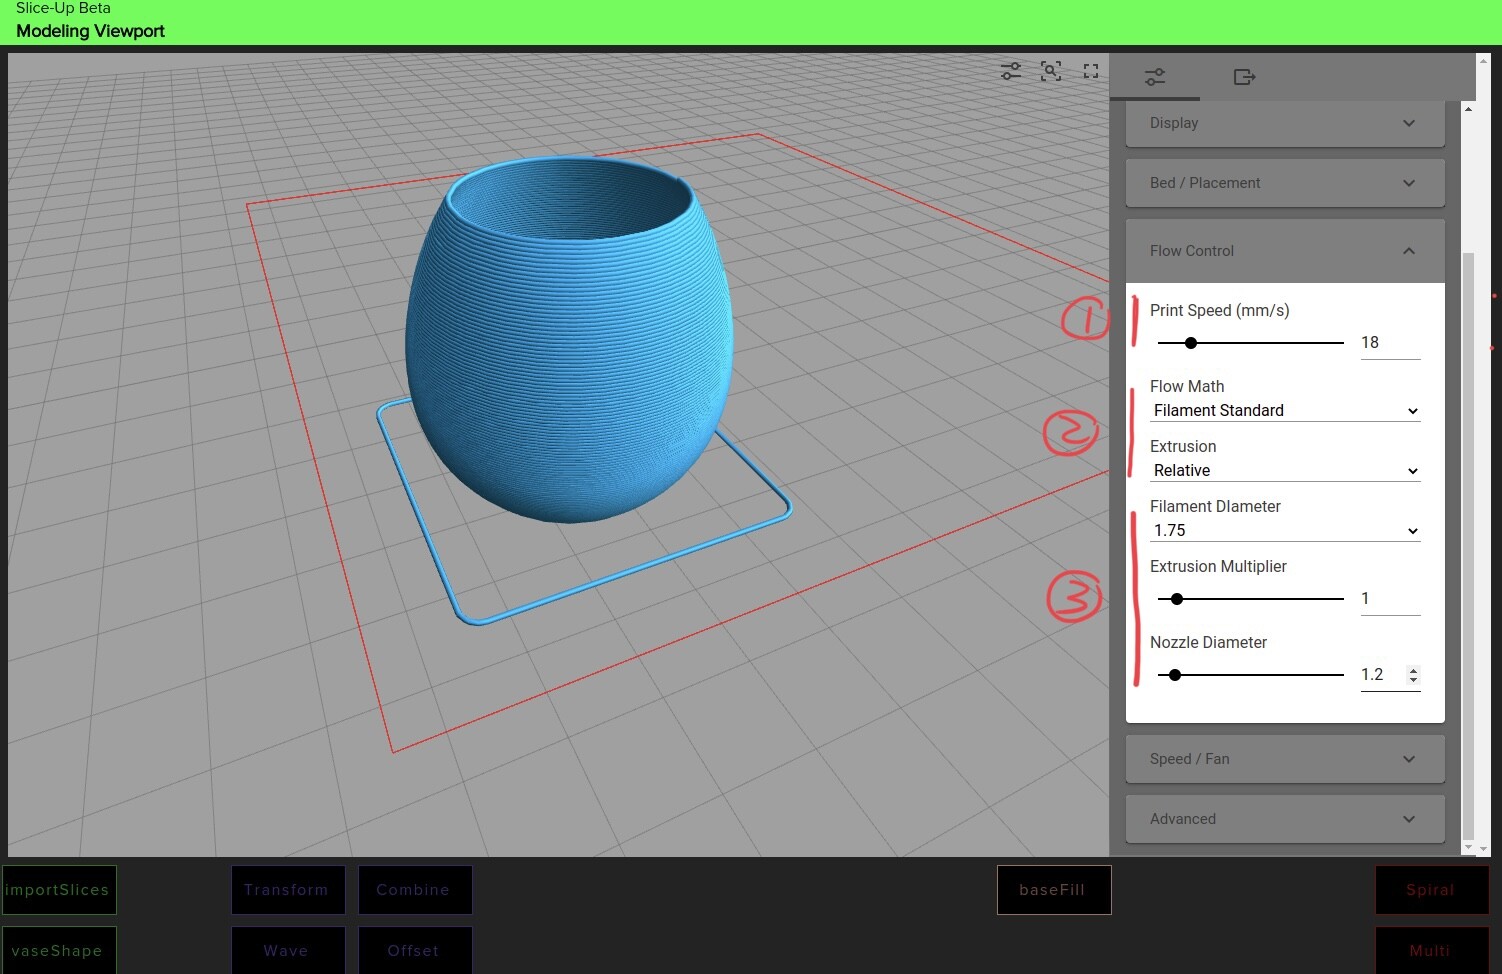
Now the hard part, we need to set up the flow:
-
Select the desired
print speedin mm/s (start slow!) -
Set
Flow Math, the rule to compute the flow. If you are using filament fabrication, you should selectFilament Standard. -
Set the
Extrusiontype toRelativeorAbsolute, depending on your preference / machine. -
If you choose
Filament Standardbefore, now you must set the correctfilament diameter. -
Set the
Extrusion Multiplierand theNozzle Diameter.
WARNING: When you select extrusion type, make sure to match it with the relevant command in your gcode head(M82 for absolute, M83 for relative)
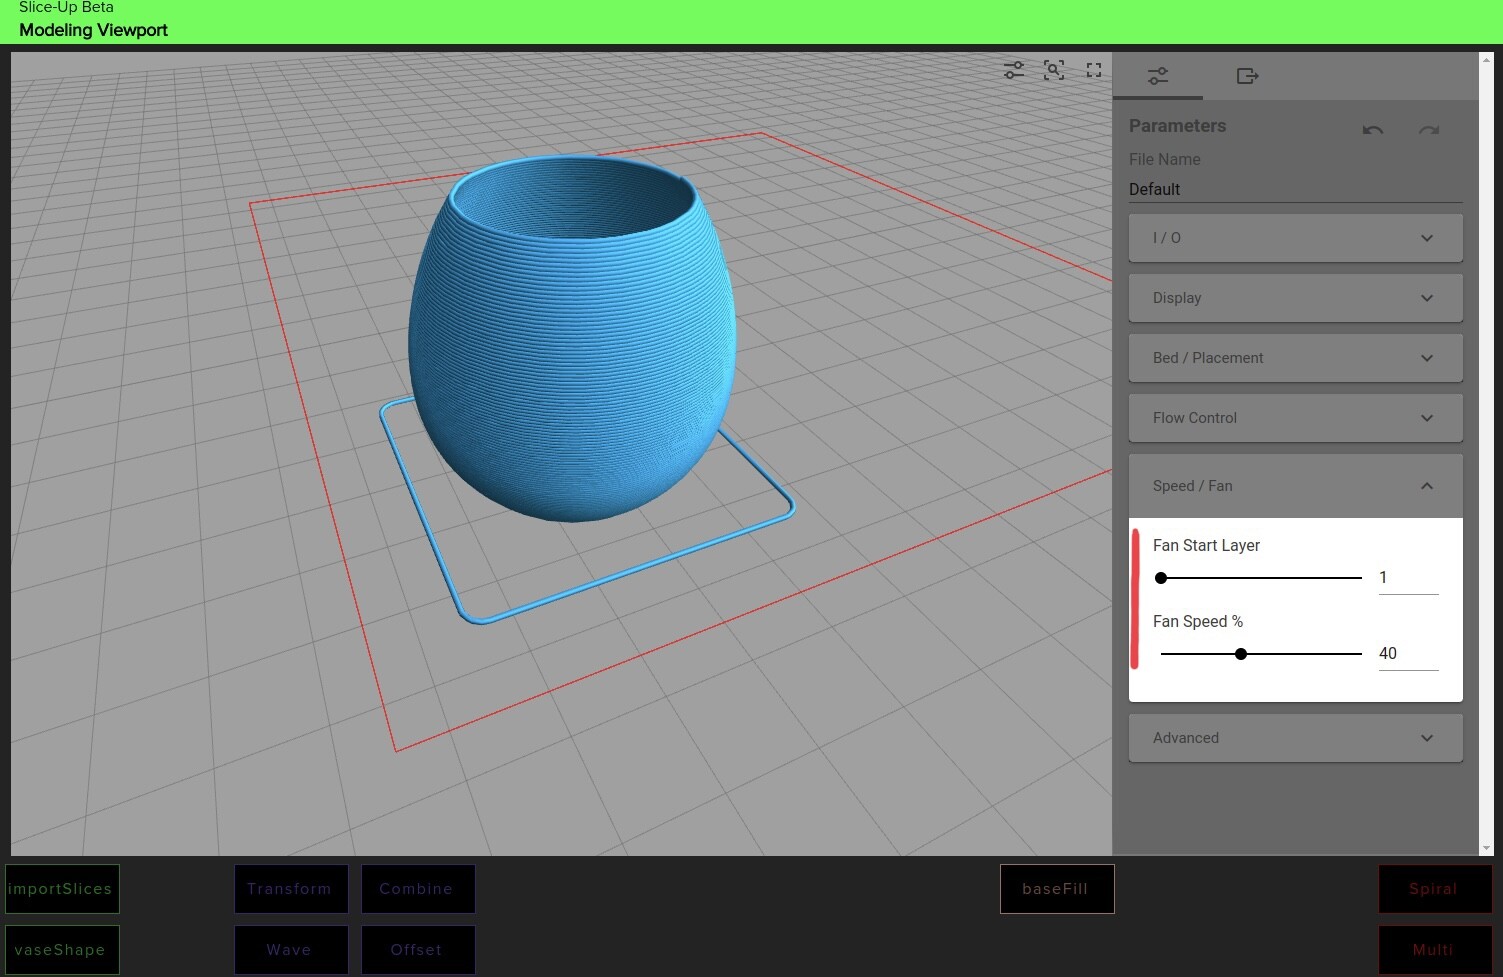
Adjust the fan speed, and the fan starting layer. If you don’t use cooling, just set fan speed to zero.
If you are printing with clay, you may want to perform one final step.
Open the advanced tab:
- Adjust the
Spiral - Base spacing. This sets the height of the spiral above the base layer. 1 will result in the spiral starting exactly 1 layer above the base, while 0 will result in the spiral starting at the same height of the base.

That’s it, you can now download your g-code and press print.
If you encounter any problems, do not hesitate to ask for help!
Happy printing!